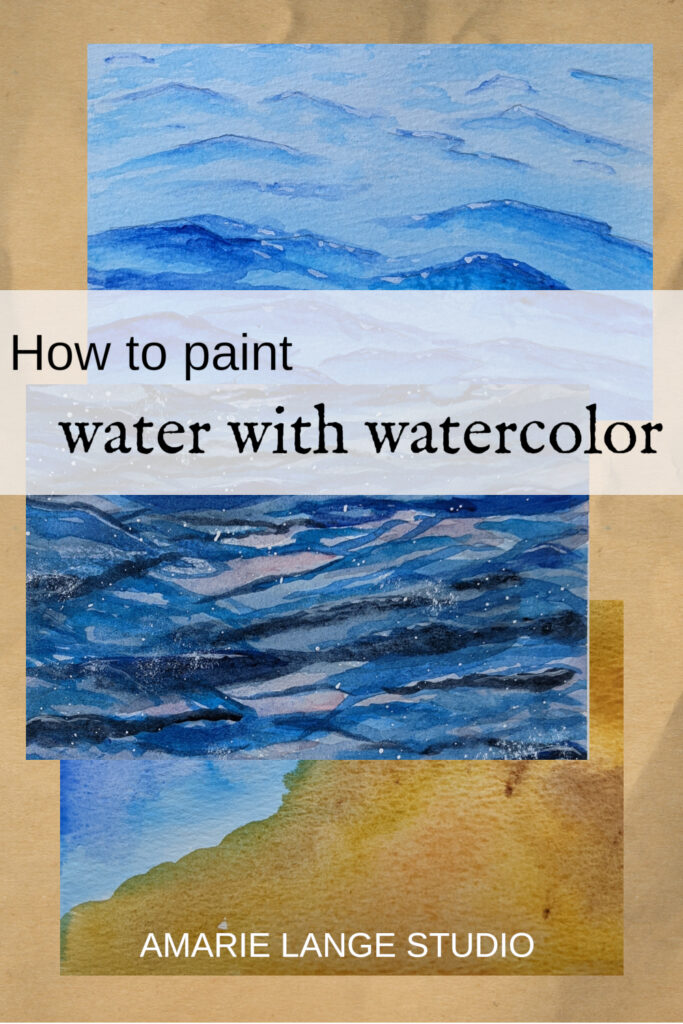
Lots of beginners ask how to paint water with watercolor. I certainly did.
How do you paint water? How do you do water painting? If your goal is realistic looking water, be prepared to practice quite a bit until you’re satisfied.
But if your goal is to explore painting watercolor water that echoes the mood and vibrancy of real water, then trying out a few new basic techniques is a great way to create a watercolor painting with a water feature.
Let me show you what I mean.
How to paint water with watercolors for beginners?
These are all beginner watercolor paintings.
Even so, I spent several hours practicing these paintings. Don’t be surprised if you find you need to practice these ideas step by step.
That’s exactly how I learn them, too.
I’m showing you how to watercolor paint water from the simplest idea to more complex later on in this blog post.
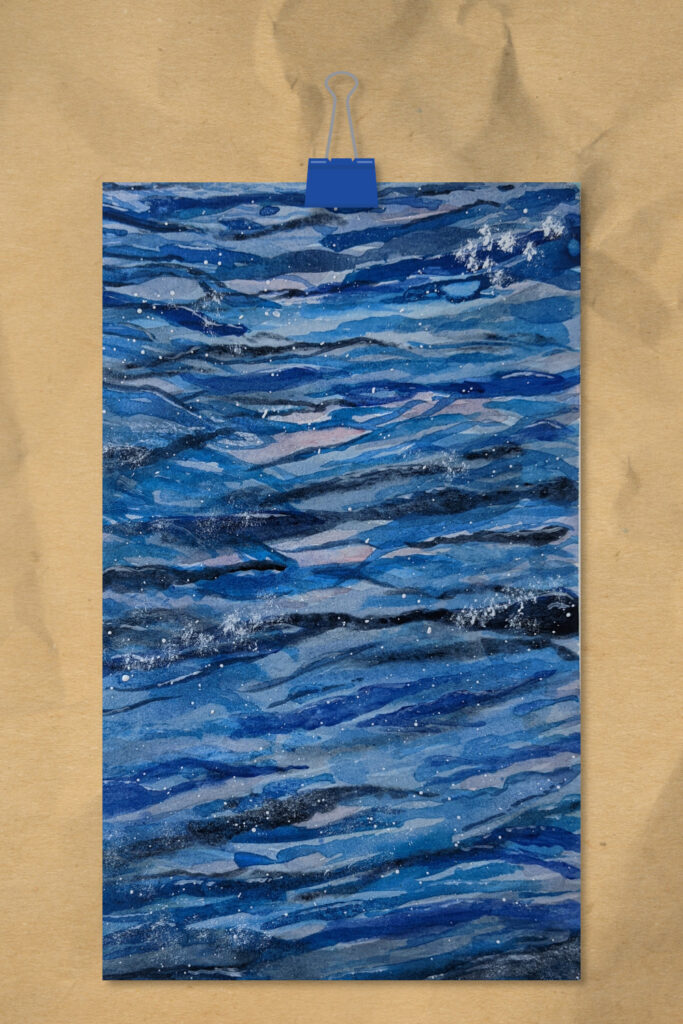
This abstract watercolor painting shows dark ripples of water in a handful of blue hues. There is also a bit of pink dropped in to show the light reflecting on the water.
This is a moody piece and it’s good for helping a beginner loosen their hand.
You’ll notice the brush strokes are linear but have a random aspect to them.
That’s important when painting water with watercolors.
I used a round brush and a wet on dry technique. That’s where the watercolor paper is dry and the paint brush is wet.
Not only are there different colors but this method gives you an interesting texture.
{Want to try something new? Come and see my post on how to paint clouds in watercolor. Have some fun!}
As I drug the wet paint across the paper’s surface, I alternated between using the brush tip and pushing down a little to force the brush to spread outward. You can do that a little, a lot and anywhere in between to create these colorful water ripples.
I always find it’s a good idea to practice these new techniques on scratch watercolor paper before trying it on my final project.
You don’t need to use too much water with this technique. A little water and much paint is the way I laid down each layer.
I did let the layers dry between brushing on the dark color. Remember, in watercolors you want to work from the light to the dark and that certainly applies to layers, too. While the blue color is the predominant color here, it’s a lot of different blues – and the lighter color pops because of all the blue paint surrounding it.
I finished up with a splattering of white spots over the top. I used a white gouache paint for this so the white stays opaque.
Try for a dramatic water effect…
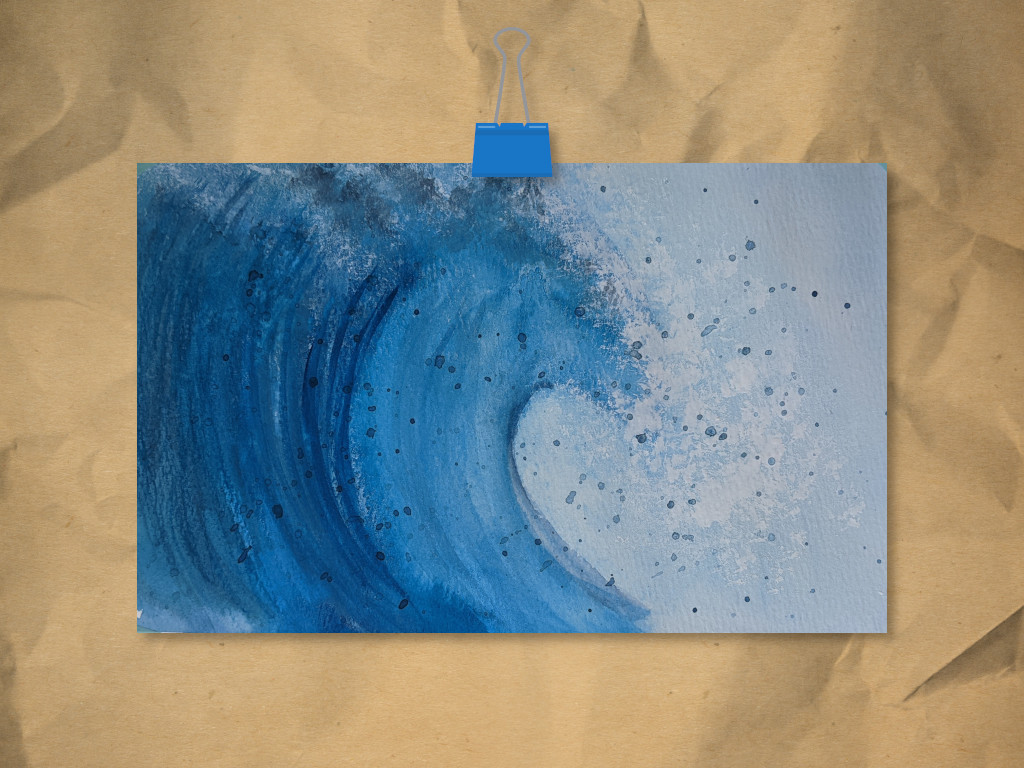
While this crashing wave looks challenging, it’s really not. Again, just different techniques – mostly a wet technique, in this case.
Using a wet brush, I laid down a wet wash of clean water. Not too much; I just wanted the watercolor to be able to float over the paper easily.
The important thing here is to wet the paper with clear water but not soak it. If you find you have puddles, use a paper towel to soak up any standing water.
Next I painted the large semi-circular wave with brush strokes using a flat brush to cover a large area with each stroke. A large round brush also works, if you’re more comfortable with using one. And I used almost pure pigments at first – very saturated color.
(A pro tip for beginner watercolourists: watercolor brushes are your best friends. Experiment to learn not only what different types of brushes can do, but what they can do in *your* hand. They are meant to work hard for you but you must teach your hand and brain how to use each brush.
Practicing brush strokes is well worth your time and something all watercolor painters – and certainly a professional watercolor artist – would excel at.)
Back to our wave painting, I varied the blue hues again, starting with the lightest blue (and therefore the most translucent) on the inner side of the wave and worked outward to deeper blues in this watercolor painting.
Taking advantage of the wet surface, I immediately added another flat wash of light blue to the unpainted (righthand) section of my paper.
You could certainly wait until the blues were dry to lay down this wash, but I was okay with the washes bleeding into each other initially. I wanted to see the water from the wave and the water from the ocean merge together. I used a clean dry brush to clean up the edge of the wave curl.
Then everything on this first layer really did have to dry thoroughly.
On the second layer, I went over the first brush strokes with even stronger colors (I used ultramarine blue and cerulean blue). I used a dry brush technique this time, which means my brush was mostly dry, just wet enough to pick up the watercolor, so when I brushed the paint on, it tended to drag and break and give me the different effects I was looking for; like water I can see through.
Don’t be afraid to combine watercolor techniques on the same pieces of artwork.
The result will be a much more complex painting.
The next layer was white gouache for the wave’s foam put on with an old, used acrylic brush with stiff, chewed up bristles. (That’s why you always save a few of your worn out brushes. Chewed up brush heads can be used to paint all kinds of interesting effects easily. Experiment!)
I applied the gouache in two layers, drying between, to get the amount and depth of foam I wanted.
As a final step, I added blue splatters.
This is a great project for beginners learning how to paint water with watercolor. It looks difficult, but is actually only a handful of simple and straightforward steps.
Try to break down your watercolor paintings into steps. It will take a lot of challenge out of a watercolor project almost immediately if you can discern the individual steps you need to take.
Then if there’s a step you aren’t sure of you can go learn that single step. I do that all the time. It really works!
Painting water texture
Time to toss out the dirty water and start again with clean water. You are painting along with me, yes? Please do!
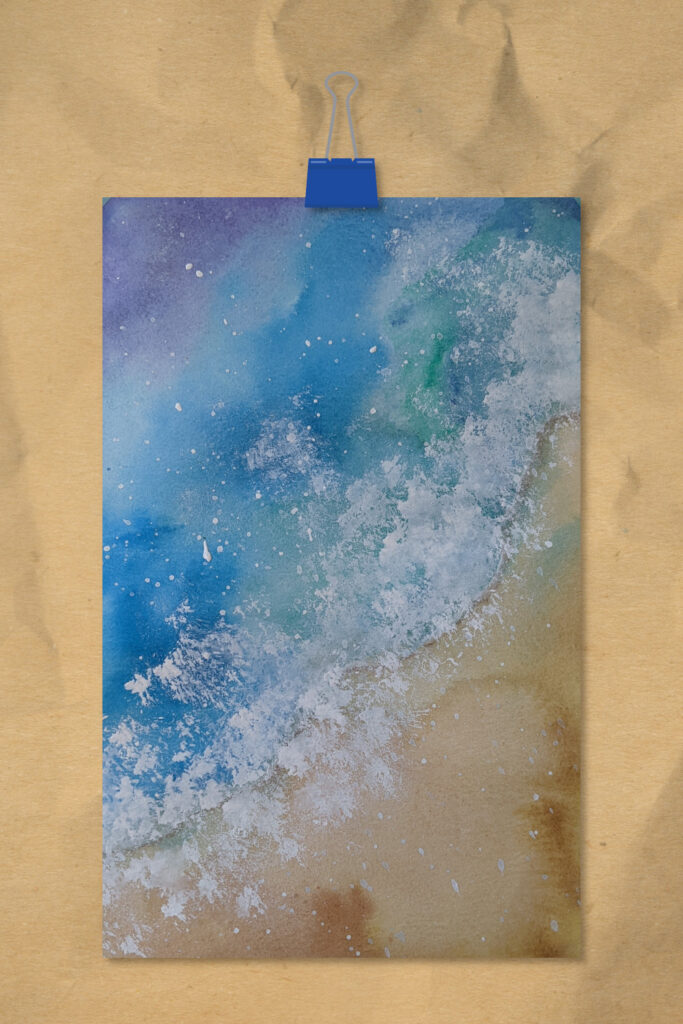
This first photo is only the watercolor background. The first abstract layers. You’ll see the finished photo of this surf edge farther below.
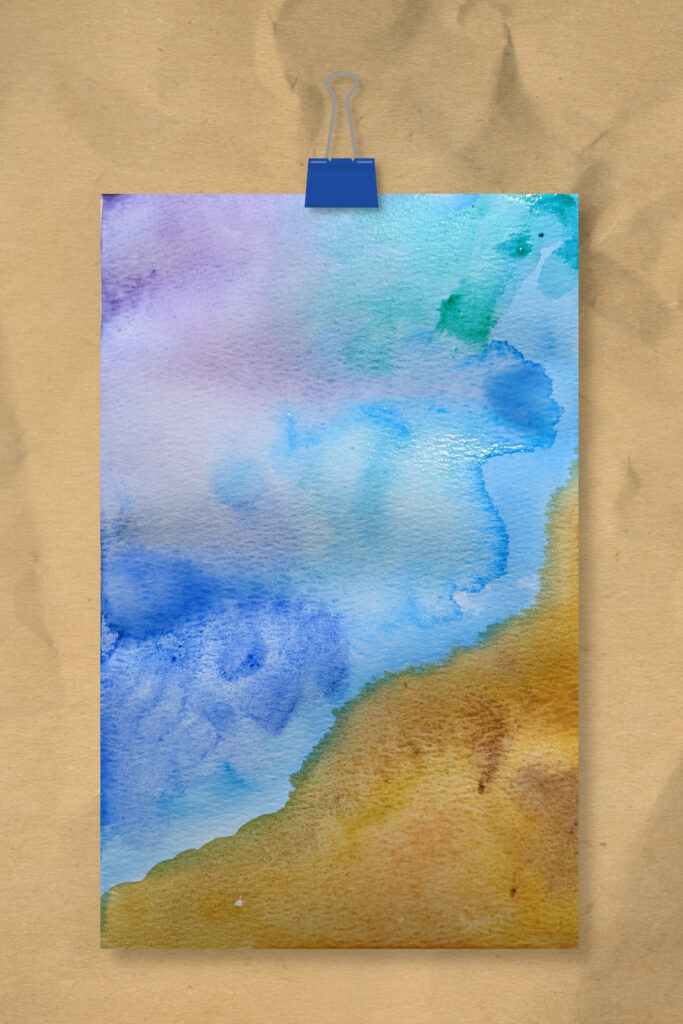
Isn’t this a beautiful watercolor piece? Tape down your watercolor paper with washi tape or masking tape; something to keep your paper from buckling when it’s wet.
We’re going to use a flat wash of clean water to start with this project. A mop brush or a flat brush works great to spread your water evenly across the paper.
Again, we don’t need puddles of excess water, so use your clean paper towel to soak up any excess water the first thing.
Starting with a clean water wash presents a great opportunity for the water color artist. You are able to achieve different shapes over larger areas with ease.
The water does the work for you. And I did use a lot of water and much color in this painting. Which means you absolutely must use watercolor paper for these paintings. The type of paper is vital, not optional, to get these types of effects.
You don’t need to use expensive materials to get these effects, but you will need products designed for watercolor painting.
So remember that when you assemble your basic supplies.
After I created the wet paper, I immediately used a large round brush to drop blues, purples and greens onto the upper left half of the painting, letting the colors bleed together but not mixing them (this would simply produce a muddy color).
I used the green along what would become the surf’s edge. Where the water is the most transparent and the green from seaweed sometimes loves to reflect back out of the water.
I cleaned my brush, then created a sandy beach with mostly light colors of yellow ochre, burnt sienna and a tiny amount of burnt umber from watercolor tubes.
Again, resist the urge to over mix these colors. You have less control when working with a wet technique, but the lesson is to let the wet areas do the work for you, just guiding the paint with your brush if necessary.
Learning to control the amount of water you need in watercoloring is a basic technique and worth the practice.
Along the surf’s edge, which is this painting’s focal point, I let the color bleed together a little. If this gets out of control, take a dry brush and gently brush along the surf’s edge to soak up some pigment, but honestly, I wanted those water-and-sand colors to gently merge, just like on a real beach.
Now comes the drying time. The best way to dry your watercolor paper between layers is really up to you. I often work on other projects or even other parts of the same painting while waiting for a section to dry. Blowdryers or a heat gun can speed things up for you, just be careful to hold them at a reasonable distance from your work as they can push paint around if they’re used too closely. And heat guns get really hot so be careful!
Once dry, I added additional layers of paint to push up the vibrancy levels and let everything dry again. Then using a small round brush and some dark(er) brown paint, I painted a gently meandering surf line where the blue water and golden sand had combined.
I soften the edges of that line so there are no hard edges visible.
{Painting backgrounds to use for hand lettering or printable invitations is very similar to this process. Check out my post on painting watercolor backgrounds if you want to learn more techniques.}
After that layer dries, it’s time to add some surf. As explained above in the giant wave painting, I used an old, raggedy acrylic round brush to dab opaque white paint and create a foamy surf. I find I need to do this in two or three layers, allowing drying time between each layer.
Then the final step is white (opaque paint again) spatters for a sea spray look.
Beautiful.
How to paint water ripples?
How’s it going? Are you getting any new ideas on how to paint water with watercolor? Honestly, a good way – the best way I’ve found – to make progress is to be consistently practicing.
Even if it’s only 15 minutes a day or 30 minutes every other day.
What a different that can make for you.
Here is the beginning of a new watercolor water painting.
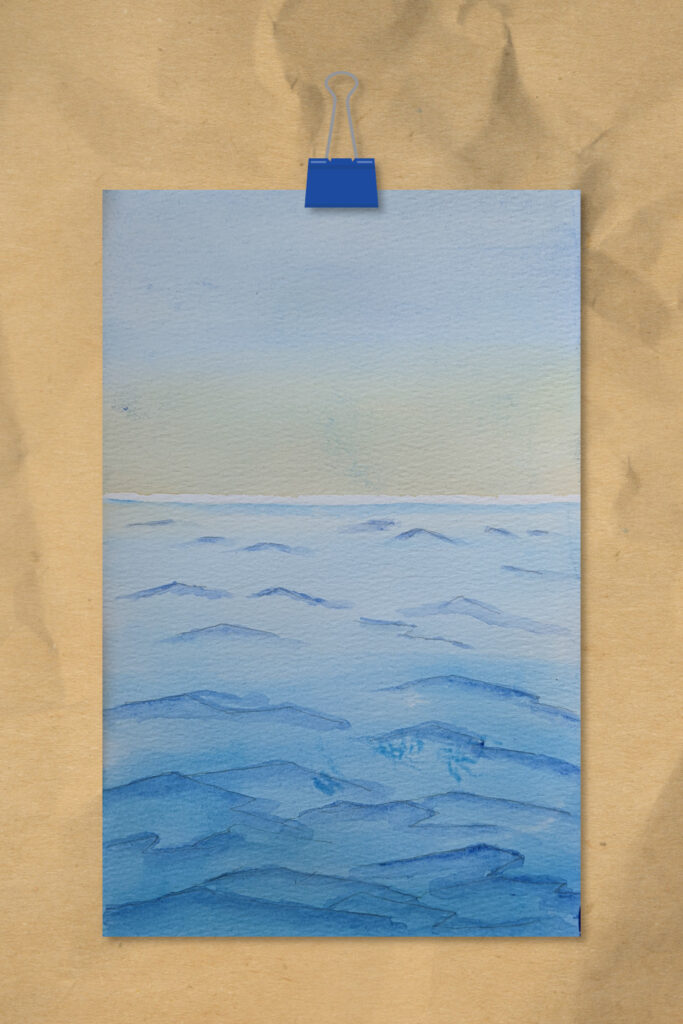
I have blocked out the waves, a horizon line and filled in the graded washes for the background.
This subject matter is a bit more challenging, but still beginner friendly with a little practice.
I chose this painting because I actually followed the instructions of a watercolor painter on youtube for this tutorial to show you how much that can help and I’m happy to share her expertise with you, as well. And I changed a few parts to reflect the way I wanted to paint. You can do that, too!
(She is also on Skillshare where I’ve watched an even more in depth step by step tutorial for this painting.)
Start by taping your dry paper down again as we will be using wet washes once more.
(Even if you’re following a class, a reference photo can be a great aid. Being able to study waves and ripples of water as you’re painting them can really boost your understanding of a subject.)
This time we will be creating a horizon line which is easy to do with a piece of tape. You can put your horizon line wherever you like, however, general landscape painting wisdom tells us to not place our horizon line in the exact middle of our painting. A little higher or a little lower makes for a more pleasing effect.
After wetting the paper with clean water above the taped horizon line, I painted a graded wash of mostly blue from the top down meeting a graded wash of a little yellow ochre along the horizon line.
After removing the horizon line tape, I added another graded wash of blue from the bottom up to the horizon line (being careful to leave a tiny dry, white space between the top and bottom washes so they didn’t bleed together). So the center of this watercolor painting is filled with a lighter shade of these two washes.
I let this dry thoroughly.
As you’ve seen there are many different ways to learn how to watercolor-paint water. What we’ve talked about in this post is just scratching the surface.
All of these paintings have had a limited watercolor palette. This keeps them a bit easier with less colors to mix and apply.
This watercolour painting is no different.
Only two blues are used in this painting. Choose a midtone blue and a darker blue.
Over the initial wash, I actually lightly sketched in a few waves so I’d know exactly where my paint needed to be applied.
You can do that, too, if it helps.
I brushed in waves using a medium round brush at the bottom and a smaller round brush as I moved closer to the horizon.
This is basically a painting of layers. I kept adding the darker colors (blues) carefully to the tops of the waves and the midtone blue underneath the darker top portion of the waves, being mindful to preserve bits of the original lighter wash.
Keep doing those layers until you are satisfied.
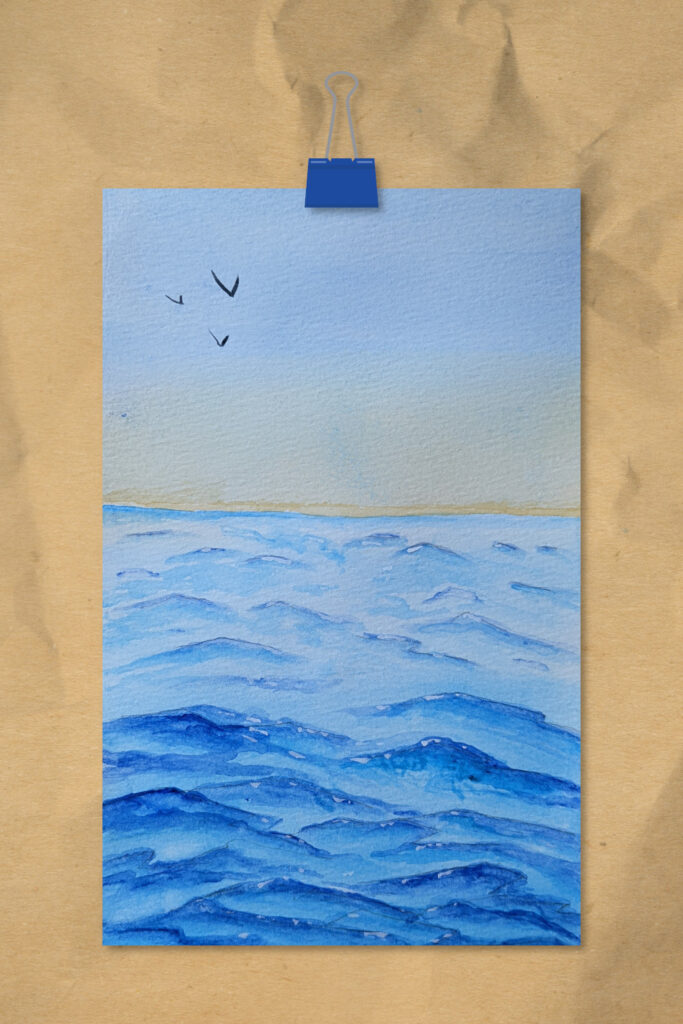
Keep in mind that the closer you get to the horizon, the small and lighter your waves need to be for perspective’s sake.
I used a liner brush and blue paint and carefully drew across the horizon line.
This looks more real if you make the line straight but not solid all the way across.
I also added a tiny line of yellow ochre on top of the horizon line. This gives the easy illusion of far away land.
The final touches were to add some white gouache highlights along the center waves and a few birds in the sky.
Totally optional, but the instructor I was following recommended it and I agreed. It’s a great touch.
I wanted to show you how I use instruction. We all can learn from each other.
Actually, I take watercolor classes a lot. The first time I paint something new, I go looking for a watercolor class.
Cuts down my learning time from a long time to a short hour or two, in most cases.
Be sure and invest in yourself, as well.
How do you paint watercolor in water step by step?
Well, you don’t have all the answers to that question, but you have a good start. One good point from all of this is to not let watercolor painting be intimidating. I did that for years and all it did was to keep me from improving at a consistent rate.
Learning about things like primary colors, a color wheel and basic techniques means your skill level and confidence will grow. That will probably result in you becoming a happier watercolor painter! Even at the beginner level, there are a lot of satisfying moments in watercolor painting.
And if you’ve used acrylic paint or oil paint before, there are differences to be explored in learning how to paint water with watercolor – or paint anything with watercolor.
Speaking of which, you might like my post filled with beginner easy watercolor painting ideas. That post also has another watercolor water painting idea for you to explore so check it out!
Come and see! And whatever you do, keep painting!